Welcome to our step-by-step guide on how to set up resistance bands for assisted pull-ups! We know pull-ups can be hard, especially for beginners. They are tough for anyone trying to build upper body strength. That’s where resistance bands come in. They are an excellent tool. They will support your progress and help you develop proper technique. This guide will help you set up. It will make you feel confident as you work to achieve your fitness goals. Let’s get started on this journey together!


Choose the Right Resistance Band
Select a resistance band that matches your strength level. If you’re starting out with pull-ups, opt for a thicker band, as it provides greater help. This support will help you build strength and confidence. It will help you work up to unassisted pull-ups.
Experiment with different resistance bands as your strength improves. Transition to thinner bands once you notice the thicker band becoming too easy to manage. This gradual change lets you challenge your muscles more. It also ensures you maintain proper form and technique as you progress. Pay close attention to your body during each workout. Mix and match bands to find the perfect support level.
Locate a Pull-Up Bar
Start by identifying a suitable location for your pull-up bar. Find a sturdy bar. It must support your weight and any added equipment, like resistance bands. Check the weight limit specified by the manufacturer to ensure it meets your needs. Check the bar’s condition. It must be durable and undamaged, with no rust or cracks.
Position the bar at a height that allows you to hang with your feet above the ground. Reach up and grab the bar. Check if you can hang. Your arms should be straight and your body in a line. If needed, adjust the height or choose a different spot to mount the bar. Make sure you anchor it well to prevent any wobbling during your workout.
Attach the Resistance Band
Loop the resistance band over the pull-up bar. Make sure you center it and make it even. Adjust the band so it fits snugly on the bar. It should not slide or shift during your workout. Make sure the band is not twisted and lies flat against the bar for greatest stability.
Pull gently on the band to double-check its security. You want to confirm that it can handle the tension without slipping off. If the band feels loose or moves easily, reposition it until you achieve a secure fit. This step is crucial for your safety and the effectiveness of your exercise routine.
Position the Band for Assistance
Attach the resistance band to a sturdy overhead support, such as a pull-up bar, ensuring it is secure. Once you connect the band, slide one foot or knee into the loop of the band. Ensure that it is snug around your limb and check its stability before proceeding. This setup creates a springy support. It gives you a boost for your pull-up routine.
Engage your core and grip the bar with both hands, positioning your body in a stable manner under the bar. As you start the pull-up, let the band assist you while you pull your chin above the bar. Maintain a steady rhythm, focusing on your form as you rise and lower your body. Check the band’s position during your workout. It must stay secure to keep you safe.
Grip the Pull-Up Bar
Grab the pull-up bar with both hands, ensuring your palms face away from you in an overhand grip. Your hands should be slightly wider than shoulder-width apart. This will engage the right muscles and give you stability.
By following these steps, you’ll set a solid foundation for your pull-up routine, maximizing your performance from the very beginning.
Perform the Assisted Pull Up
Place your foot or knee in the resistance band. Someone attached it to the pull-up bar. Grip the bar with both hands. For a standard pull-up, your palms should face away. For a chin-up, they should face you. Pull your body upward toward the bar by engaging your upper back, arms, and shoulders. Keep your core tight throughout the movement to maintain stability.
Lower yourself back down in a controlled manner until your arms are fully extended. As you come down, resist the urge to drop quickly; this slow descent will help build strength. Repeat this process for the desired number of repetitions. Aim for a smooth, strong performance each time. For example, if you can do 8 assisted pull-ups comfortably, try to increase that as you gain strength. Focus on your form—keep your body straight and avoid swinging.
Final Considerations for Success
In conclusion, using resistance bands for assisted pull ups is an excellent way to boost your strength training regimen. By following the steps outlined in this post, you can easily set up your bands to support your pull up journey. As you practice and gradually increase your strength, you’ll find yourself mastering this challenging exercise in no time. So grab your resistance bands, stay consistent, and watch your pull up performance soar!
Essential Equipment Checklist


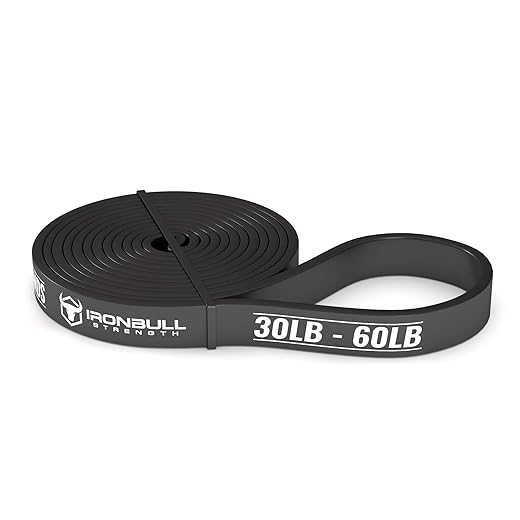
Maximize Your Workout
Maximize Your Pull-Up Technique with Resistance Bands
Remember, practice makes perfect! Enjoy your workout!
Your Questions Answered: Resistance Bands FAQs
Absolutely, you can use resistance bands to assist with pull-ups, and it’s a great option for beginners! Here are some key points to keep in mind:
1. Assistance Level: Choose a resistance band that provides the right level of support for your current strength. Thicker bands offer more assistance, while thinner bands provide less. As you gain strength, you can gradually switch to thinner bands.
2. Placement: To use a resistance band for pull-ups, loop it over the pull-up bar and then pull one end of the band through the other to create a secure knot. Place your foot or knee in the band, which will help lift you as you pull up.
3. Form: Maintain proper form while using the bands. Engage your core, keep your back straight, and avoid swinging your body. This will help you get the most out of your workout and prevent injury.
4. Progression: As you become stronger and more comfortable with the movement, start reducing the assistance by switching to a thinner band or doing unassisted pull-ups. Aim for gradual progression.
5. Warm-Up and Cool Down: Always warm up before your workout and cool down afterward. This helps prepare your muscles for the exercise and aids in recovery.
6. Consistency: Incorporate resistance band-assisted pull-ups into your regular workout routine for the best results. Consistency is key to building strength and improving your pull-up performance.
Using resistance bands for pull-ups can effectively build your strength and confidence, making it a fantastic tool for beginners. Happy training!









I followed this guide to set up my resistance bands, and wow, what a game changer! I started with the 50-pound band from WOD Nation, and I can finally do pull-ups without struggling. I went from zero pull-ups to being able to do five in a row! Thanks for the clear steps!
Have you guys tried doing weighted pull-ups after mastering the assisted ones? I’d love to see a guide on that next! It seems like a natural progression after getting the hang of them.
That’s a great suggestion! I’ll look into creating a guide on weighted pull-ups. It’s definitely a challenging yet rewarding progression!
I love using resistance bands for various workouts! I also use them for dips and rows. Would be cool to see a guide on how to incorporate bands into a full-body workout.
Incorporating bands into a full-body routine is a fantastic idea! I’ll definitely add that to the list for future articles.
That’s awesome to hear! It’s always great to see progress. Keep pushing, and you’ll be doing unassisted pull-ups in no time!
I’m confused about the band choice. Should I start with a heavier band if I’m a beginner? Any specific recommendations for someone who’s just starting out?
I’ve been using the Iron Bull Strength bands, and they’ve been pretty helpful. But I noticed they stretch over time. Anyone else experience that? What brands do you recommend that last longer?
I just wanted to share that my friend went from struggling with pull-ups to doing 10 unassisted after using bands for a few months. Super inspiring! Keep at it, everyone!
That’s an incredible story! It’s amazing what consistency and the right tools can do. Thanks for sharing your friend’s success—it can motivate others!
What if I don’t have a pull-up bar at home? Are there any alternatives or variations I can try with resistance bands? I don’t want to miss out on this workout!
You can definitely use a sturdy door frame or even a tree branch if you’re outside! I’ll consider adding alternative setups in future guides.
For those struggling with the grip, have you tried using gymnastics grips? I found they help a ton! Makes it more comfortable, especially during higher reps.